

Deploy Node.js with PostgreSQL to Heroku using Add-ons
Heroku allows developers to deploy Node.js app with PostgreSQL database on their platform. This is a simple tutorial for deploying a similar application using Node.js and PostgreSQL.
Before we begin the tutorial, I want to say about my OS. I’m using Linux, Ubuntu 16.04.
This is my repository for the tutorial on Github.
1. Working on local machine with Node.js and PostgreSQL
First, we should work with Node.js and PostgreSQL on a local machine environment before deploying onto Heroky.
1.1. Quickstart Node.js app with express
Express is a minimal and flexible Node.js web application framework that provides a robust set of features for web and mobile applications. We can use the package to create node.js app fastly.
# Create new directory
mkdir tut-heroku-node-pg
cd tut-heroku-node-pg/

# Initialize node.js by Express with view engine is ejs
express --ejs --git

# Install packages
npm install
1.2. Environment Variables in Node.js with dotenv
Dotenv is a zero-dependency module that loads environment variables from a .env file into process.env. To use environment variables for node.js app, use package dotenv and create file .env for app.
npm install dotenv --save
touch .env
- Open file
.envand add lines formatedkey=valuewithout spaces, example:
SECRET_KEY=jwor9334bg5
- With
dotenv, now we can access environment variables in file.envbyprocess.env.*. To access effectively and accurately, we create fileconfig.js.
touch config.js
- In file
config.js, we export environment variables to use by following lines:
module.exports = {
    secretKey: process.env.SECRET_KEY || 'default secret key'
}
We also have to configure package
dotenvby require package inapp.js.At the top of file
app.js, add the following lines
// load environment variables in file .env to process.env.*
require('dotenv').config();
1.3. Configure PostgreSQL database
Now, we’ll create new PostgreSQL database at local to use. You can use pgAdmin (GUI application) to simplify the steps. In tutorial, I used pgAdmin3
pgAdmin is the most popular and feature rich Open Source administration and development platform for PostgreSQL, the most advanced Open Source database in the world.
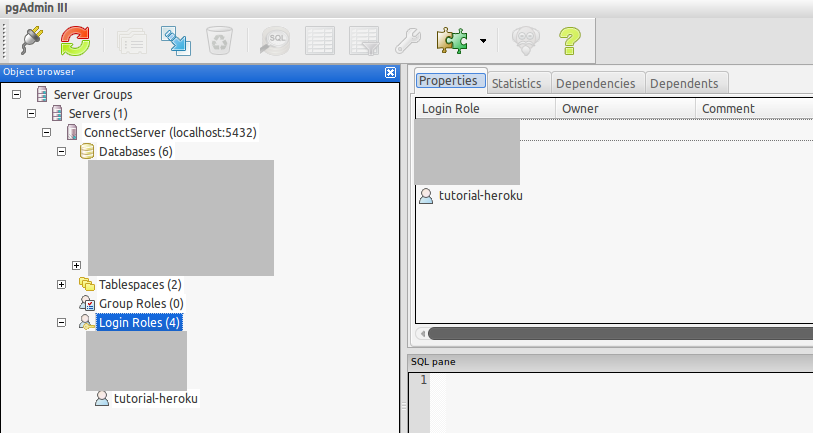
- Open
pgAdmin. If you have existen user, you shouldn’t create new user. To create new user, atLogin RoleschooseNew Login Role. I created new user with username istutorial-herokuand password is12345
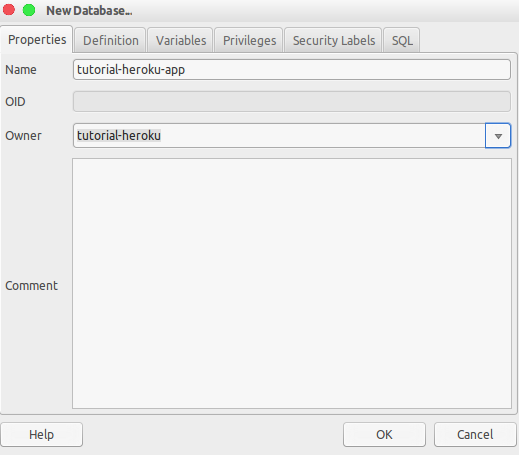
- Create new database by choose
New DatabaseatDatabasesand create new. I created new databasetutorial-heroku-appwith owner istutorial-heroku
After having new database, we should get some database infomation. You can see host, port at GUI, my host and port is
localhost:5432Open file
.envto add the values:
DB_HOST=localhost
DB_PORT=5432
DB_NAME=tutorial-heroku-app
DB_USERNAME=tutorial-heroku
DB_PASSWORD=12345
- We should also export the values in file
config.js:
module.exports = {
    secretKey: process.env.SECRET_KEY || 'default secret key',
    db: {
        dialect: 'postgres',
        host: process.env.DB_HOST || 'localhost',
        port: process.env.DB_PORT || '5432',
        database: process.env.DB_NAME || 'database',
        username: process.env.DB_USERNAME || 'username',
        password: process.env.DB_PASSWORD || 'password'
    }
}
1.4. Connect Node.js to PostgreSQL using sequelize
Sequelize is a promise-based ORM for Node.js v4 and up. It supports the dialects PostgreSQL, MySQL, SQLite and MSSQL and features solid transaction support, relations, read replication and more.
npm install --save pg pg-hstore sequelize
mkdir config
cd config
touch sequelize.js
- In file
config/sequelize.js, we will create new instance of Sequelize and export the instance which is connected to database:
const Sequelize = require('sequelize');
const config = require('../config');

const { database, username, password } = config.db;

const sequelize = new Sequelize(
    database, username, password, config, { timezone: '+07:00' }
);

module.exports = sequelize;
1.5. Create database models with sequelize
- Run some commands for initialize models
mkdir models
touch index.js
touch user.js
touch post.js
- In file
user.js, create new schema with sequelize:
const Sequelize = require('sequelize');
const sequelize = require('../config/sequelize');

const User = sequelize.define('User', {
    id: {
      type: Sequelize.INTEGER,
      allowNull: false,
      autoIncrement: true,
      primaryKey: true
    },
    username: {
      type: Sequelize.STRING,
      unique: true
    },
    password: { type: Sequelize.STRING(1024) }
}, {
    createdAt: 'created_at',
    updatedAt: 'updated_at',
    timestamps: true,
    underscored: true,
    underscoredAll: true
});

module.exports = User;
- In file
post.js, create new schema with sequelize:
const Sequelize = require('sequelize');
const sequelize = require('../config/sequelize');

const Post = sequelize.define('Post', {
    id: {
      type: Sequelize.INTEGER,
      allowNull: false,
      autoIncrement: true,
      primaryKey: true
    },
    title: { type: Sequelize.STRING },
    content: { type: Sequelize.STRING },
    user_id: { type: Sequelize.INTEGER }
}, {
    createdAt: 'created_at',
    updatedAt: 'updated_at',
    timestamps: true,
    underscored: true,
    underscoredAll: true
});

module.exports = Post;
- In file
index.js, import schema models and add relationship between tables:
const Sequelize = require('sequelize');
const sequelize = require('../config/sequelize');

const User = require('./user');
const Post = require('./post');

/** Relationship between Entities */
User.hasMany(Post, { foreignKey: 'user_id', as: 'Posts' });
Post.belongsTo(User, { foreignKey: 'user_id', constraints: false, as: 'user' });

module.exports = {
    sequelize,
    User,
    Post
};
Now we can require sequelize and auto create table and forign key.
In file
app.js, add lines
const { sequelize } = require('./models');

/** Connect and config Database */
sequelize.sync()
  .then(() => console.log('PostgresSQL is sync'))
  .catch(err => console.log(err));
- Now run
npm start, we will see
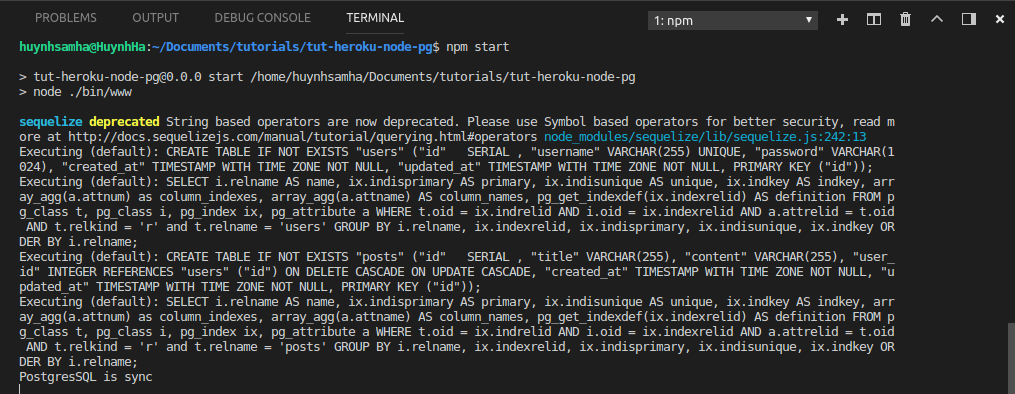
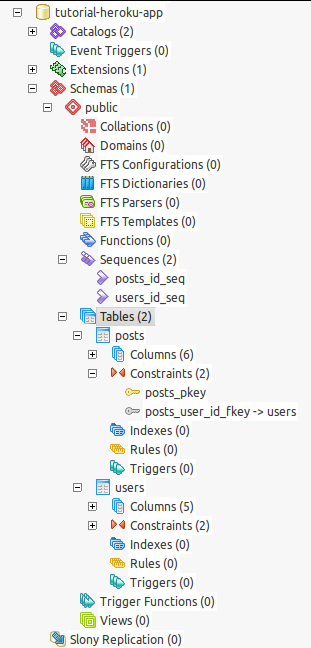
- Open
pgAdminand refresh, you can see 2 sequences, 2 tables with foreign key created auto
1.6. Create APIs for models
Create file
posts.jsinroutes.Edit file
routes/users.jswith:
var express = require('express');
var router = express.Router();

const { User } = require('../models');

/* GET users listing. */
router.get('/', function (req, res, next) {
  User.findAll({ attributes: { exclude: ['password'] } })
    .then(data => res.status(200).send(data))
    .catch(err => res.status(500).send(err))
});

module.exports = router;
- Edit file
routes/posts.jswith:
var express = require('express');
var router = express.Router();

const { Post, User } = require('../models');

/* GET posts listing. */
router.get('/', function (req, res, next) {
  Post.findAll({
    include: [{ model: User, as: 'user' }]
  })
    .then(data => res.status(200).send(data))
    .catch(err => res.status(500).send(err))
});

module.exports = router;
- Edit file
app.jswith:
var index = require('./routes/index');
var users = require('./routes/users');
var posts = require('./routes/posts');

app.use('/', index);
app.use('/users', users);
app.use('/posts', posts);
1.7. Create scripts for database (drop and fake data)
- To create or drop database quickly, you maybe add some
scripts.
mkdir scripts
cd scripts/
touch drop.js
touch fake.js
- In file
package.json, add scripts
{
    "scripts": {
        "start": "node ./bin/www",
        "db:fake": "node scripts/fake",
        "db:drop": "node scripts/drop"
    }
}
- Add package
asyncto fake data simpler
npm install async --save
- In file
drop.js, edit by
require('dotenv').config();
const { sequelize } = require('../models');

sequelize.drop().then(() => {
  console.log('Drop successully'); process.exit(0);
}).catch(err => {
  console.log(err); process.exit(0);
})
- In file
fake.js, edit by
require('dotenv').config();
const async = require('async');
const { sequelize, User, Post } = require('../models');

const users = [];
for (let i = 0; i < 15; i++) {
  users.push({ username: 'username_' + i, password: 'password_' + i });
}

sequelize.sync().then(() => {
  async.eachSeries(users, (user, cb) => {
    User.create(user).then(user => {
      const posts = [];
      const num_posts = Math.floor(Math.random() * 6);
      for (let i = 0; i < num_posts; i++) {
        posts.push({
          title: 'Post ' + i + ' of user ' + user.id,
          content: 'something here',
          user_id: user.id
        });
      }
      async.eachSeries(posts, (post, cb) => {
        Post.create(post).then(post => cb()).catch(err => cb(err));
      }, (err) => cb(err))
    })
      .catch(err => cb(err))
  }, (err) => {
    if (err) {return console.log(err); }
    console.log('Fake successfully');
    process.exit(0);
  });
})
  .catch(err => console.log(err))
- Now we can
fakeordropdata by run
# for drop data
npm run db:drop
# for fake data
npm run db:fake
- Edit file
views/index.ejsby add following lines
<p>View list of users: <a href="/users" target="_blank" alt="" >}}/users</a></p>
<p>View list of posts: <a href="/posts" target="_blank" alt="" >}}/posts</a></p>
- Start server node.js and click 2 url in view to view your data, that will be:
2. Deploy to Heroku with PostgreSQL Cloud
Now we will use heroku to run our node.js, configure the postgresql database on heroku and deploy it.
2.1. Add new Heroku application
Login or sign up new account on heroku.
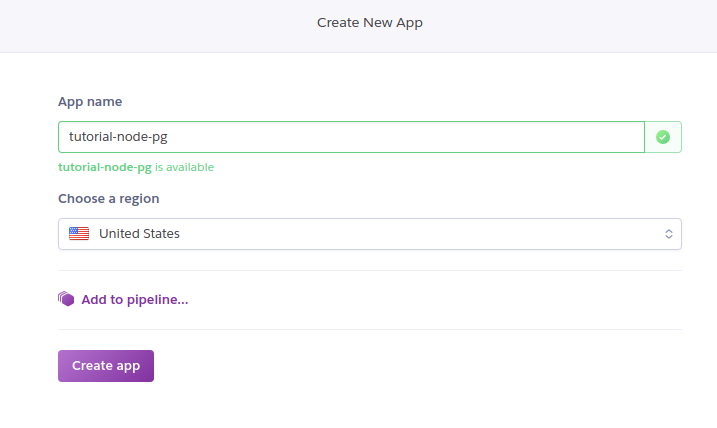
Go to dashboard heroku and create new app

- Create new app. My app name is
tutorial-node-pg, therefore, when you can’t create new app with similar name, you shold choose another.
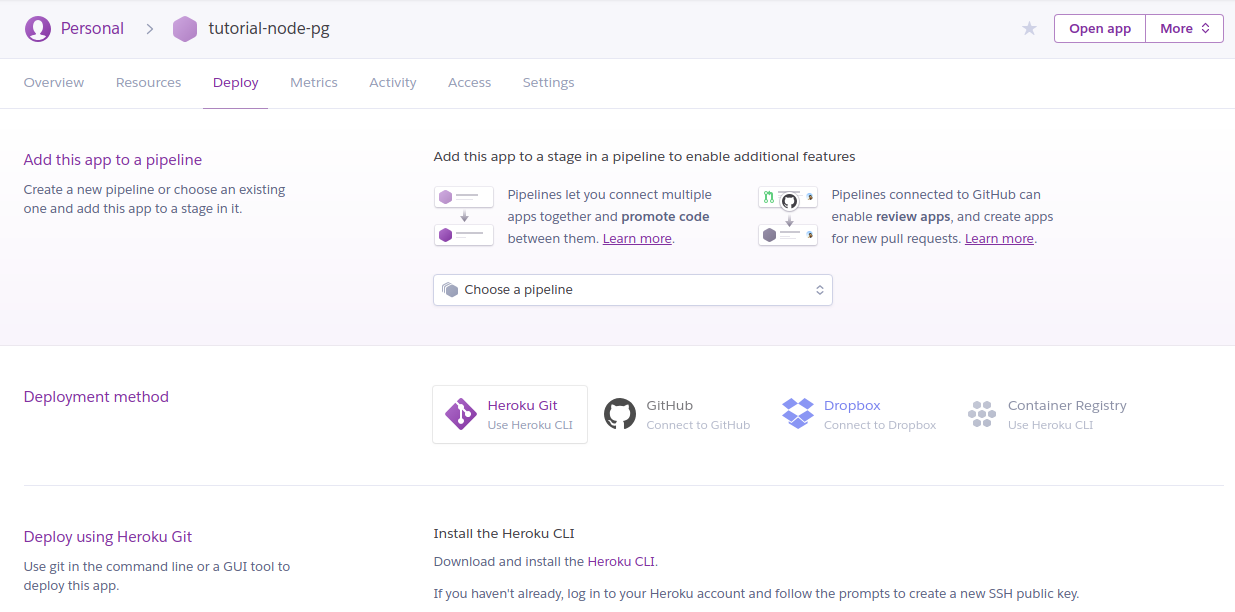
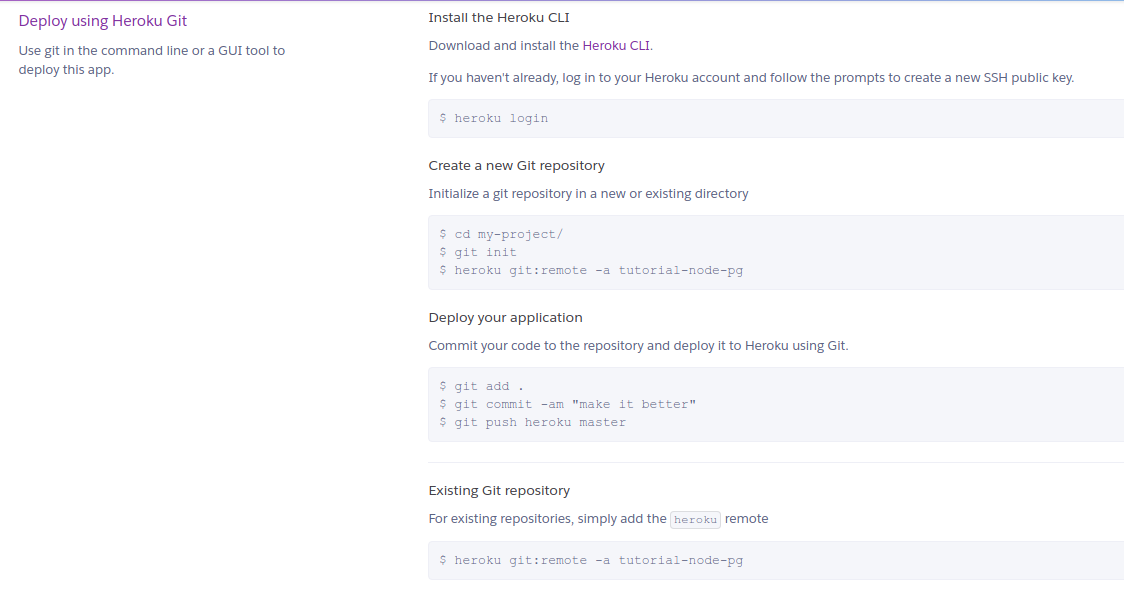
- Next, we will use git for local repository and remote to heroku
heroku login
# at your directory
git init
heroku git:remote -a tutorial-node-pg
# tutorial-node-pg should you app name
- Now, we can use git to deploy to heroku by commit and push. Because your local directory is remote to heroku, so in file
.gitignore, you don’t need ignore file.envto deploy environment variables to heroku. Therefore, check your file.gitignore, if it has line.env, you should comment that line before push to heroku. But currently we will not push to heroku because we will configure postgre data on heroku with following instructions
2.2. Add-ons PostgreSQL database on Heroku
- On heroku, choose tab
Resources, inAdd-ons, searchPostgre
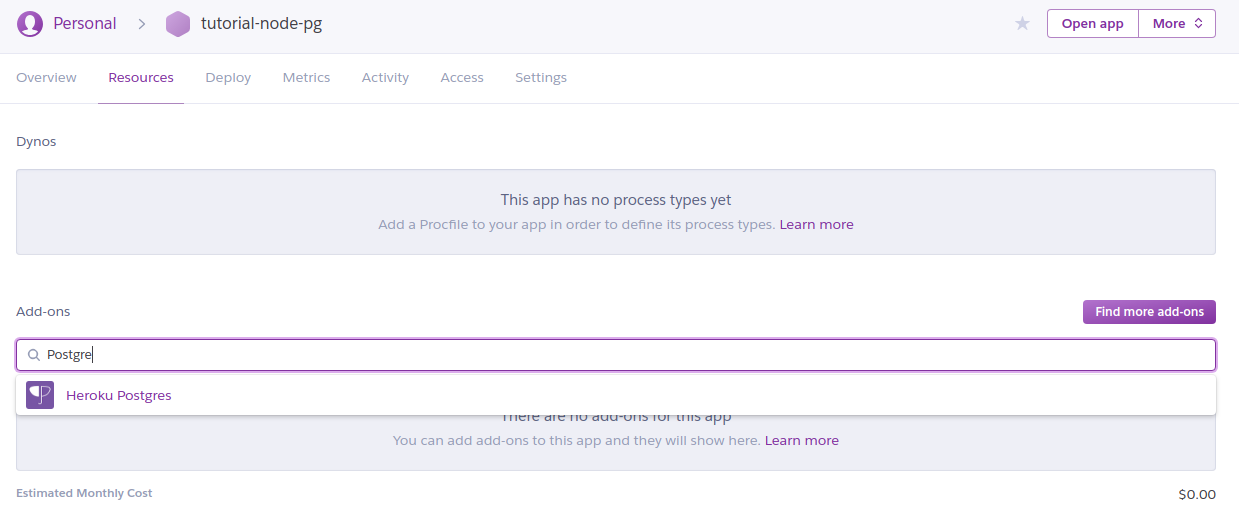
Click to
Heroku Postgreoption, one pop-up will appear and choosePlan nameisHobby Dev - Freefor free.Now heroku has created new database postgreSQL and connect it to you heroku app. You can checkout https://data.heroku.com/ by options on your top-right menu to view your database

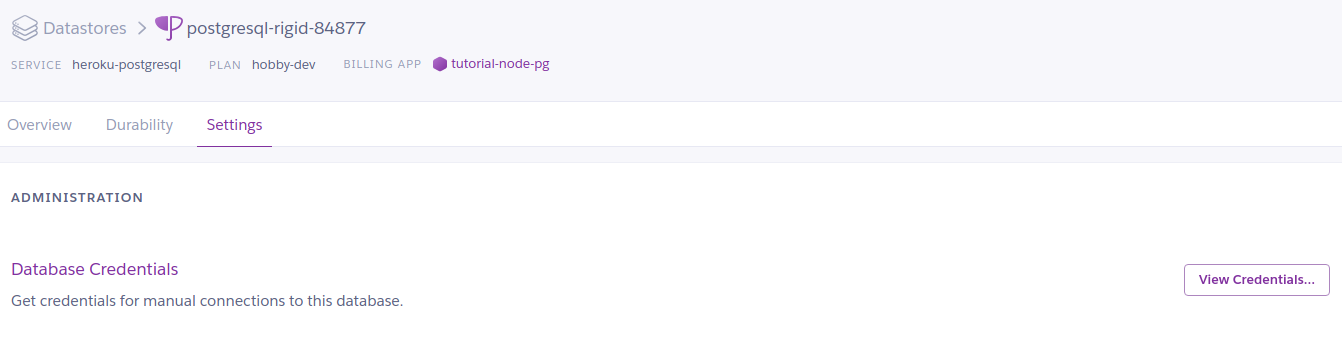
- At your data heroku page, click to your database to view details

- Choose tab
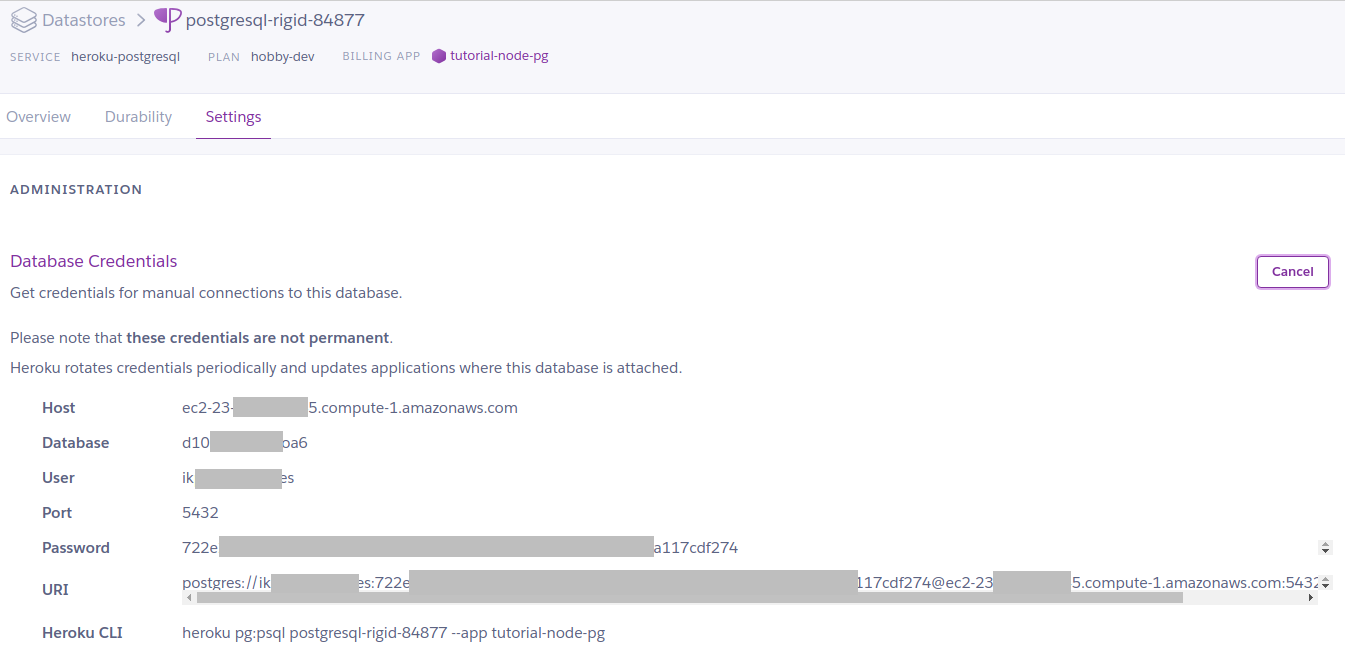
Settingsand click toView Credentials
- Now we can copy database credentials and change values in file
.envin local machine.
- Now we can deploy to heroku app by using git commands
# view changes
git status

# add all changes
git add -A

git commit -m "deploy new app"
# push to remote heroku, branch master
git push heroku master
- After commit and push to heroku, heroku auto build packages and start your server node.js. After build successfully, you can view your web herokuapp on your browser by
heroku open
You can see
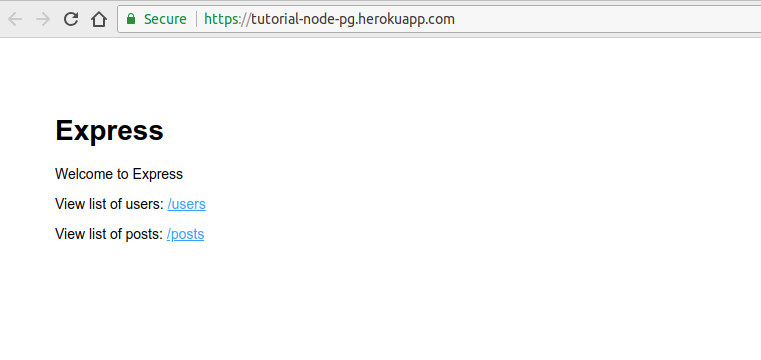
- When click
/usersor/posts, you can’t see anything, because your database on heroku don’t have any. You should add or fake some in your cloud. Now I will do that in following section.
2.3. Add or fake database on PostgreSQL Heroku
You have 2 choices, that is directly on cloud, or run on local and deploy to cloud
2.3.1. Option 1: Directly on cloud
Simply, you can run npm run db:fake, but I don’t recommend you do so, because it can not control your data on heroku. The best thing you should do is the 2nd one below I will say.
2.3.2. Option 2: Remote database PostgreSQL to local
You can see intructions here or do what I instructed next
2.3.2.1. Pull database postgre from heroku to local
- Open terminal at root project and run
heroku pg:pull DATABASE_URL heroku_node_pg_local --app tutorial-node-pg
with:
DATABASE_URL: default value for your databaseheroku_node_pg_local: name databse on your local machinetutorial-node-pg: name application on heroku
2.3.2.2. Fake data on local machine
Open pgAdmin to view your database. Now you can import database by scripts directly on local, or do the other way as:
- Open file
.envand change your database credentials (comment and add new lines):
DB_HOST=localhost
DB_PORT=5432
DB_NAME=heroku_node_pg_local
DB_USERNAME=tutorial-heroku
DB_PASSWORD=12345
- Now faking data is secure and controllable
npm run db:fake
- Your current cloud data will not have any data, because the current data is local, checked and you still do not see any data
heroku open
2.3.2.3. Push database postgre from local to heroku cloud
- Change file
.envby uncomment old lines (heroku cloud) and comment new lines (local)
heroku pg:reset
heroku pg:push heroku_node_pg_local DATABASE_URL --app tutorial-node-pg
2.4. Open Heroku App
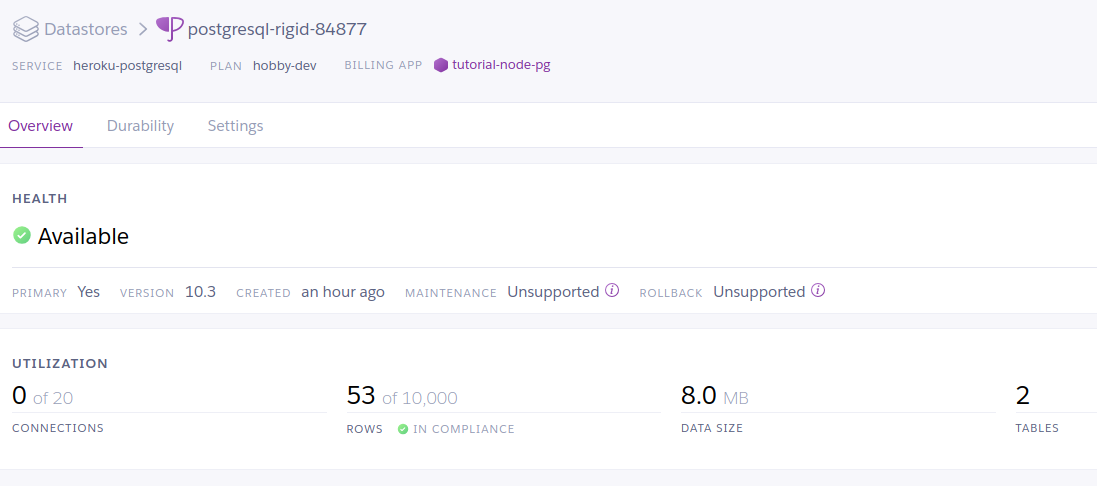
Fine! Now we can view our achievement. Open https://data.heroku.com you will see data available
Open herokuapp, you can see data also available
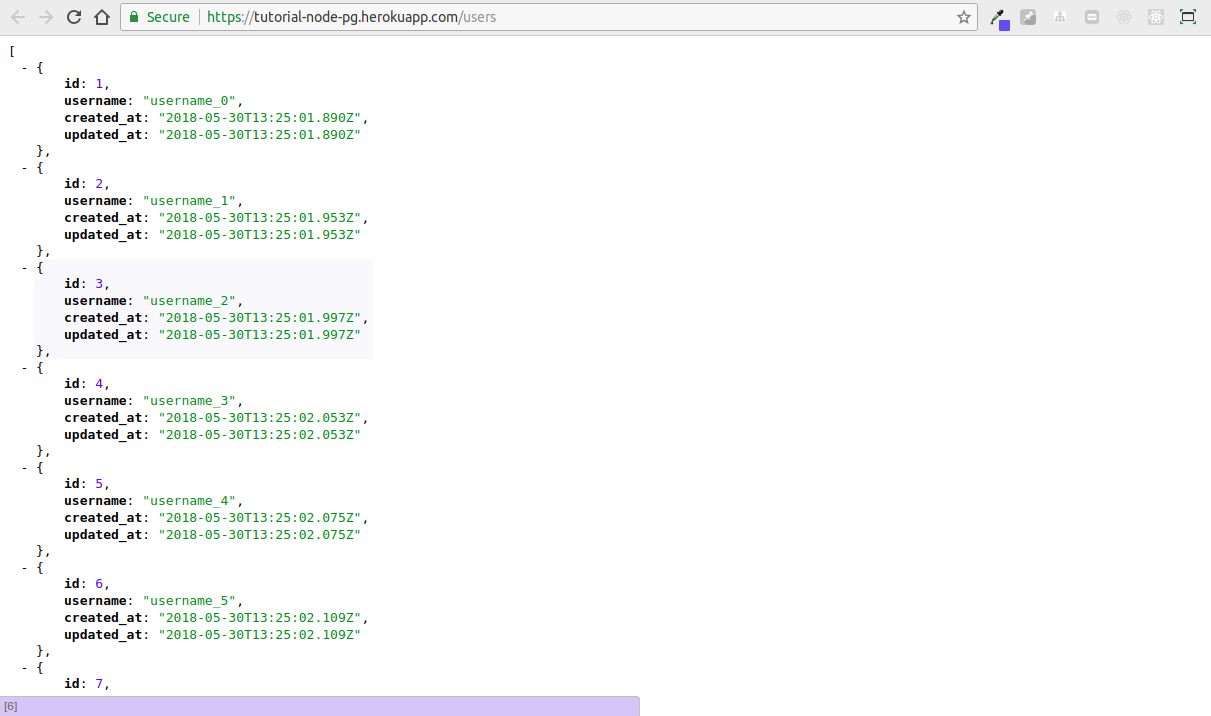
- This
/users:
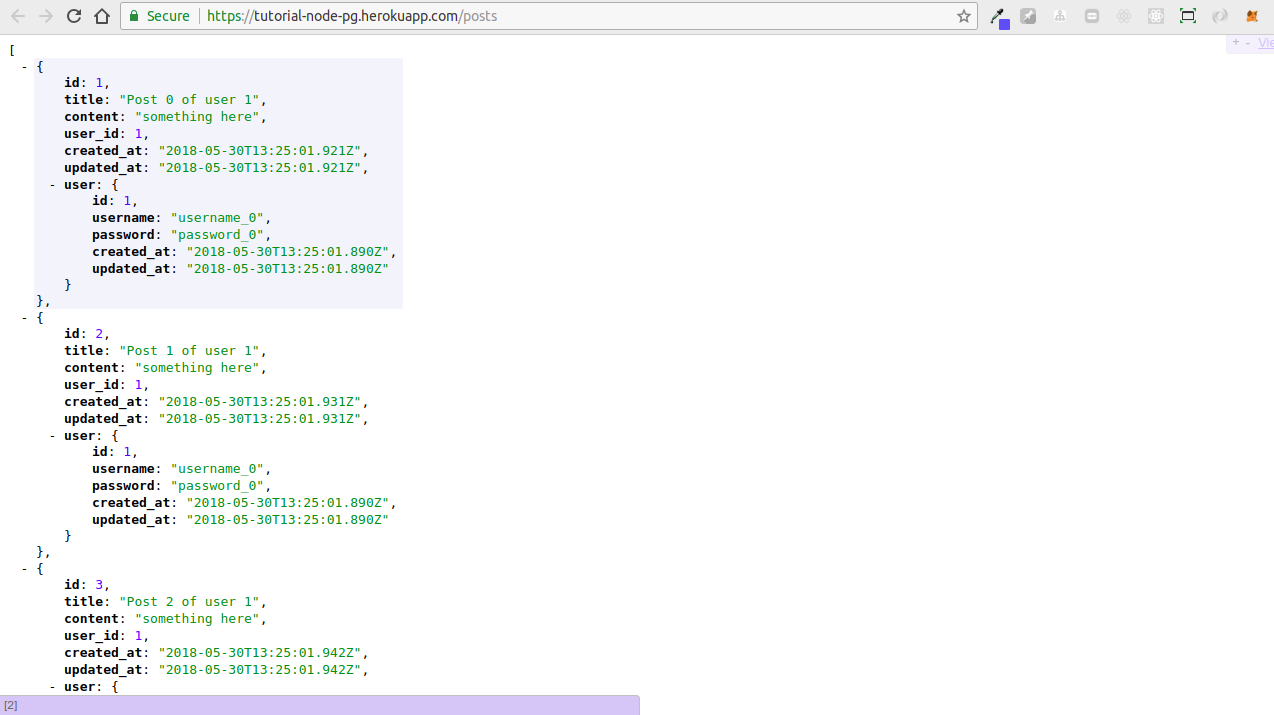
- This is
/posts:
3. Conclusion
I have shown you how to deploy a node.js app to heroku with the postgresql database, which uses some packages like express, sequelize, dotenv, pgadmin. You can see my source code for example on this Github Repository.
Thanks for reading my article! If you have any feedback or criticism, feel free to leave any comment!